|
|
Basket
0 items, £ 0.00
Complete Guide to Knitting Bobbles With Easy Bobble Stitch Instructions and Knit Bobbles Tutorial
If you’ve ever wondered how to knit bobbles, how to make them bigger or smaller, or why your bobbles sometimes turn out flat, this complete guide will walk you through everything you need to know. From easy bobble stitch instructions to a step‑by‑step knit bobbles tutorial for beginners, you’ll learn how bobbles work, how to shape them, how to fix common problems, and how to add beautiful texture to your knitting with confidence.
How Do You Knit a Bobble?
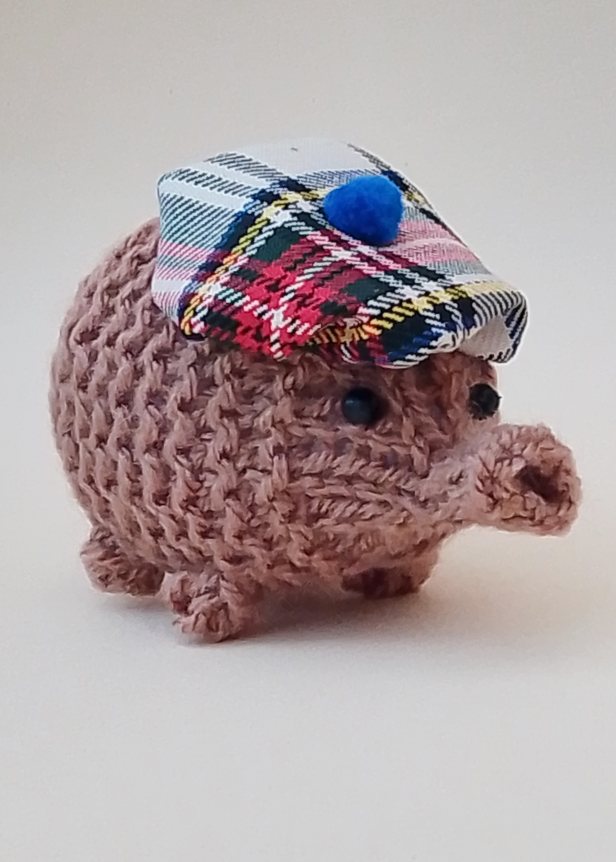
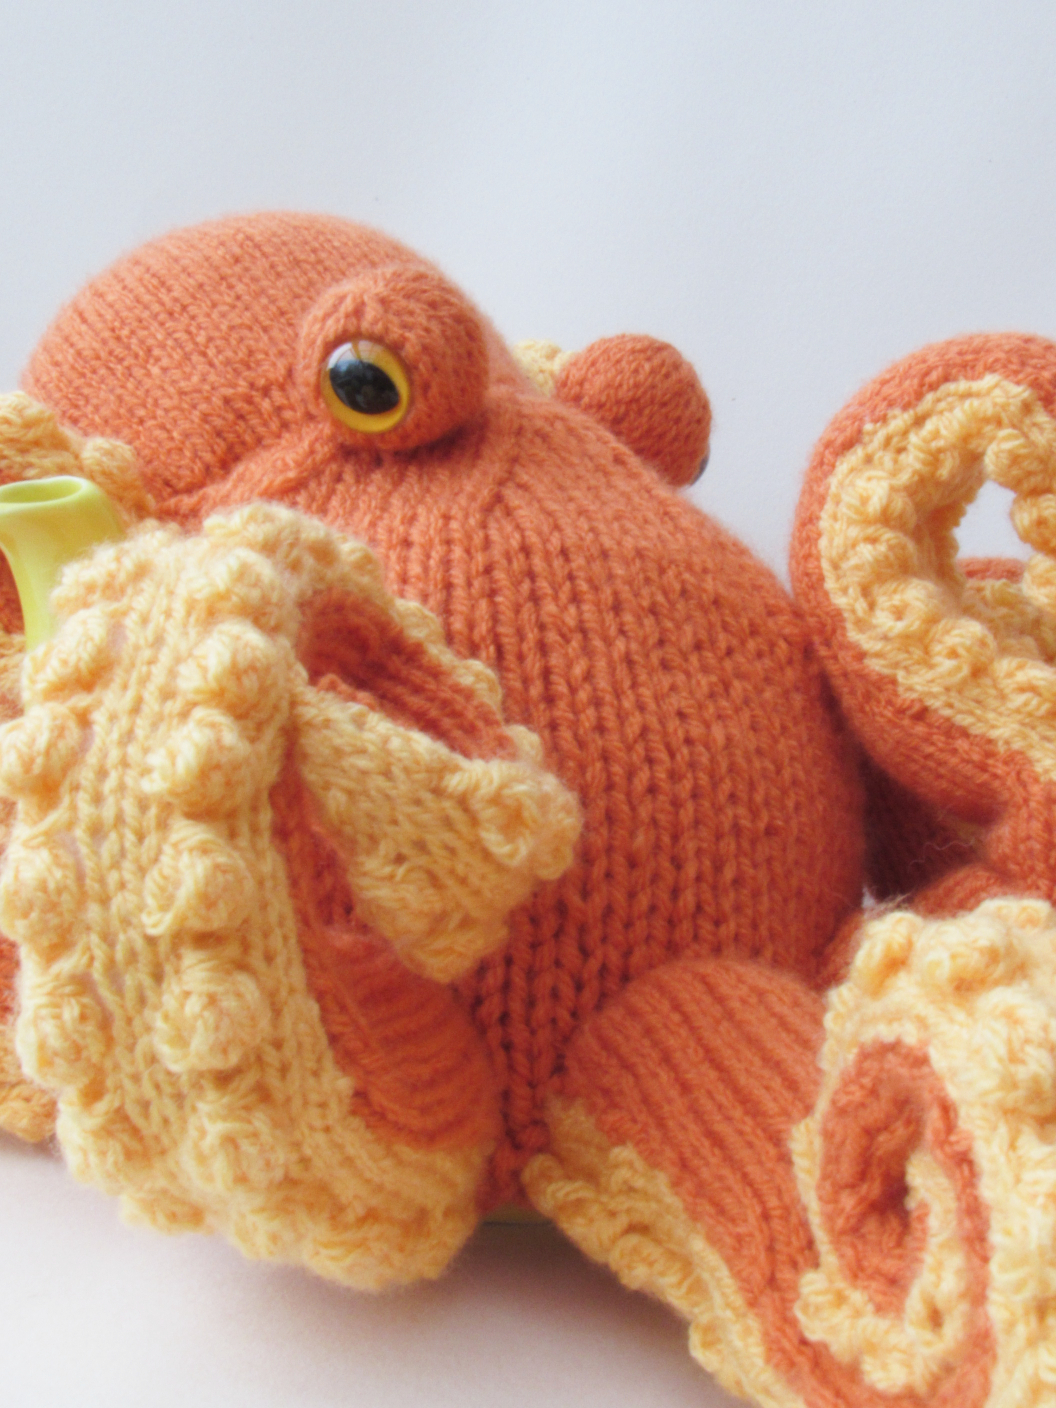
To knit a bobble, you increase several stitches into one, work a few short rows on those stitches, then decrease them back to a single stitch to create a raised bump. The simplest bobble is made by knitting into the front and back of a stitch twice, turning the work, slipping one, purling three, turning again, and knitting all four stitches together. But lets take a more in depth look at how bobbles are knitted.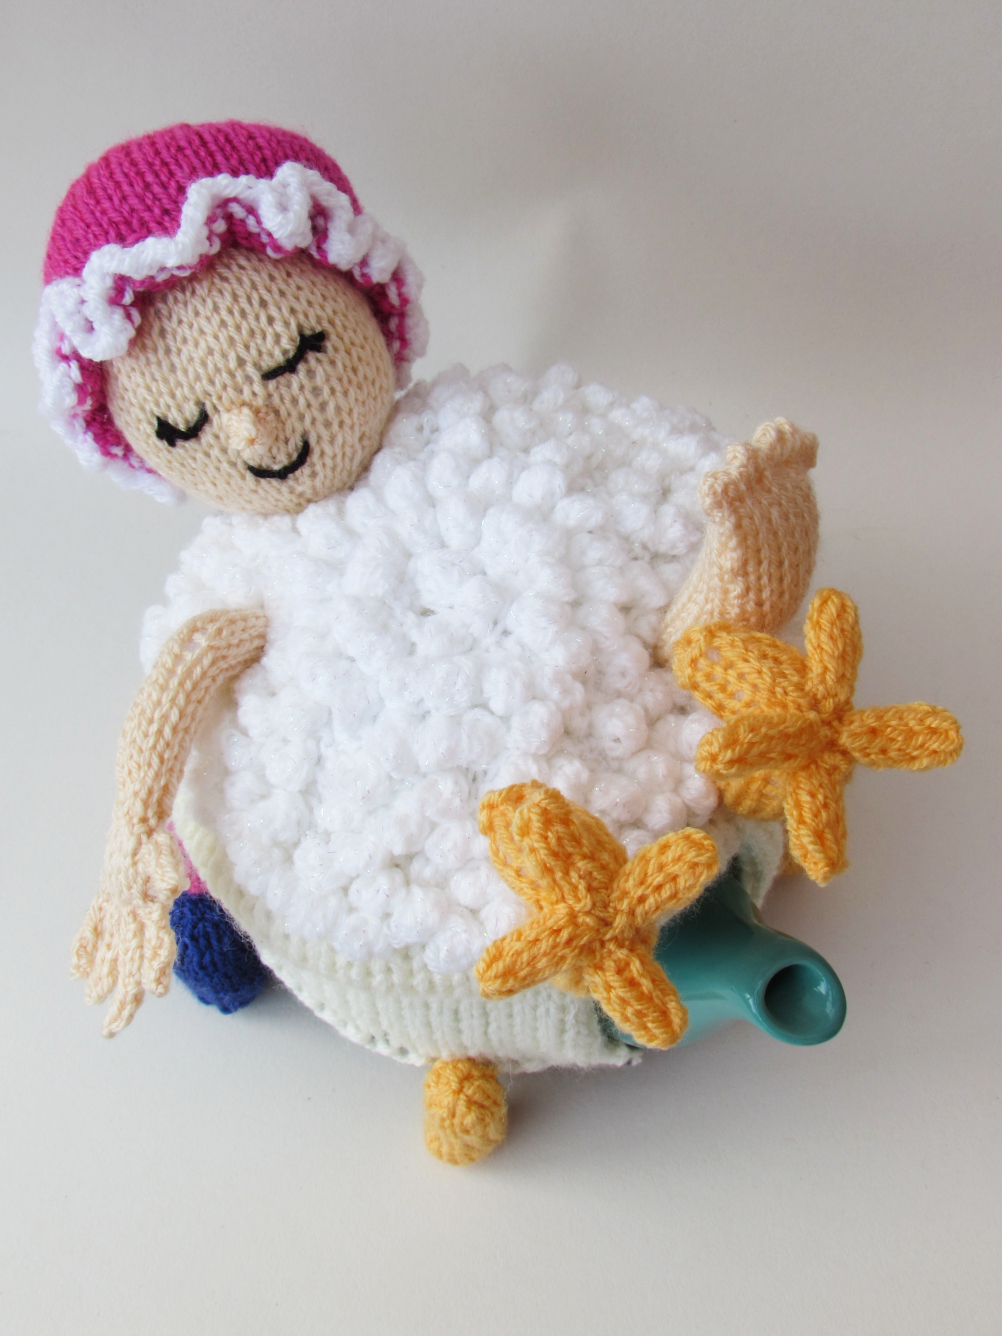 Before we get to the knitty gritty of knitting bobbles and the easy bobble stitch knitting tutorial, I just want to tell you about the joy of knitted bobbles. They are amazing as they spring forth from the flatness of the knitting, creating little bundles of woolly wonder. As a designer I have used them as toes, noses, feet, bubbles and even curls in Her Majesty's hair. What is great about them is that they bring texture and depth to the work with relative speed and ease.
For example, if you were to knit a bare foot and wanted to have toes attached, your options would be to knit the toes individually and sew them on, or to make a bobble for each toe. The bobbles are a bit of extra knitting, but compared to casting on, knitting, sewing up and attaching, it’s nothing. Plus the bobbles don't have seams, because no sewing was involved.
Knit Bobble Stitch Pattern Instructions
For a very simple, straightforward bobble, the instructions are as follows:
Knit into the front and back of the next stitch twice to make 4 sts. Turn, SL1, P3, Turn, K4tog. [1 st]
Breaking These Instructions Down As If We Are Knitting Bobbles For Beginners
Step One
You start by knitting into the front and back of the next stitch. This is the same as if you were increasing, but you need to do this twice so you create 4 stitches from the one. It's best to keep the stitches quite loose, because if they’re tight they are more difficult to work with.
Step Two
 Turn the work. This is the part that most people find unnerving. Turning the work simply means changing direction. If you started on a right‑side row, turn the work so that you are going to be working on the wrong side for the next stitches.
It feels wrong because we are taught to work to the end of the row, but mentally you need to get past it, because bobbles have short rows in them.
Step Three
Slip the first stitch so that the edge of the bobble will be tighter. Because there are fewer rows, it will naturally pull in and help create the rounded side you'd expect from a bobble. Then purl the remaining 3 stitches. Remember you are only working on the 4 stitches you created in Step One.
Step Four
Turn the work and change the direction of travel again. Adding multiple layers to these 4 stitches is what makes the bobble stand out from the main body of the knitting.
Step Five
Knit all four stitches of the bobble together to draw it in. If you can't knit 4 together because it's too difficult or the stitches are too tight, you can slip the first two stitches onto the right‑hand needle, knit the next two together, and then pass the slipped stitches over. It looks the same, just takes a bit longer, and is perfectly fine. Make sure your bobble is on the right side of the work; if it's not, you can poke it through.
Can Knitted Bobbles Be Bigger and Smaller?
Yes they can, and you can change the size of a bobble quite easily. At the start of the stitch where you knit into the front and back, this part creates the width of your bobble. You could knit into the front, back and front again to create 3 sts, which would produce a slightly slimmer bobble. Likewise you could knit into the front and back of the stitch 3 times and create 6 stitches, which would give you a wider bobble.
In the example bobble we only turned the work twice, but technically you could turn the work more times. A bigger bobble might be:
Knit into the front and back of the next stitch twice to make 4 sts. Turn, SL1, P3, Turn, SL1, K3, Turn, SL1, P3, Turn, K4tog. [1 st]
Adding extra rows means that the bobble would stand out from the work more because you have added more layers.
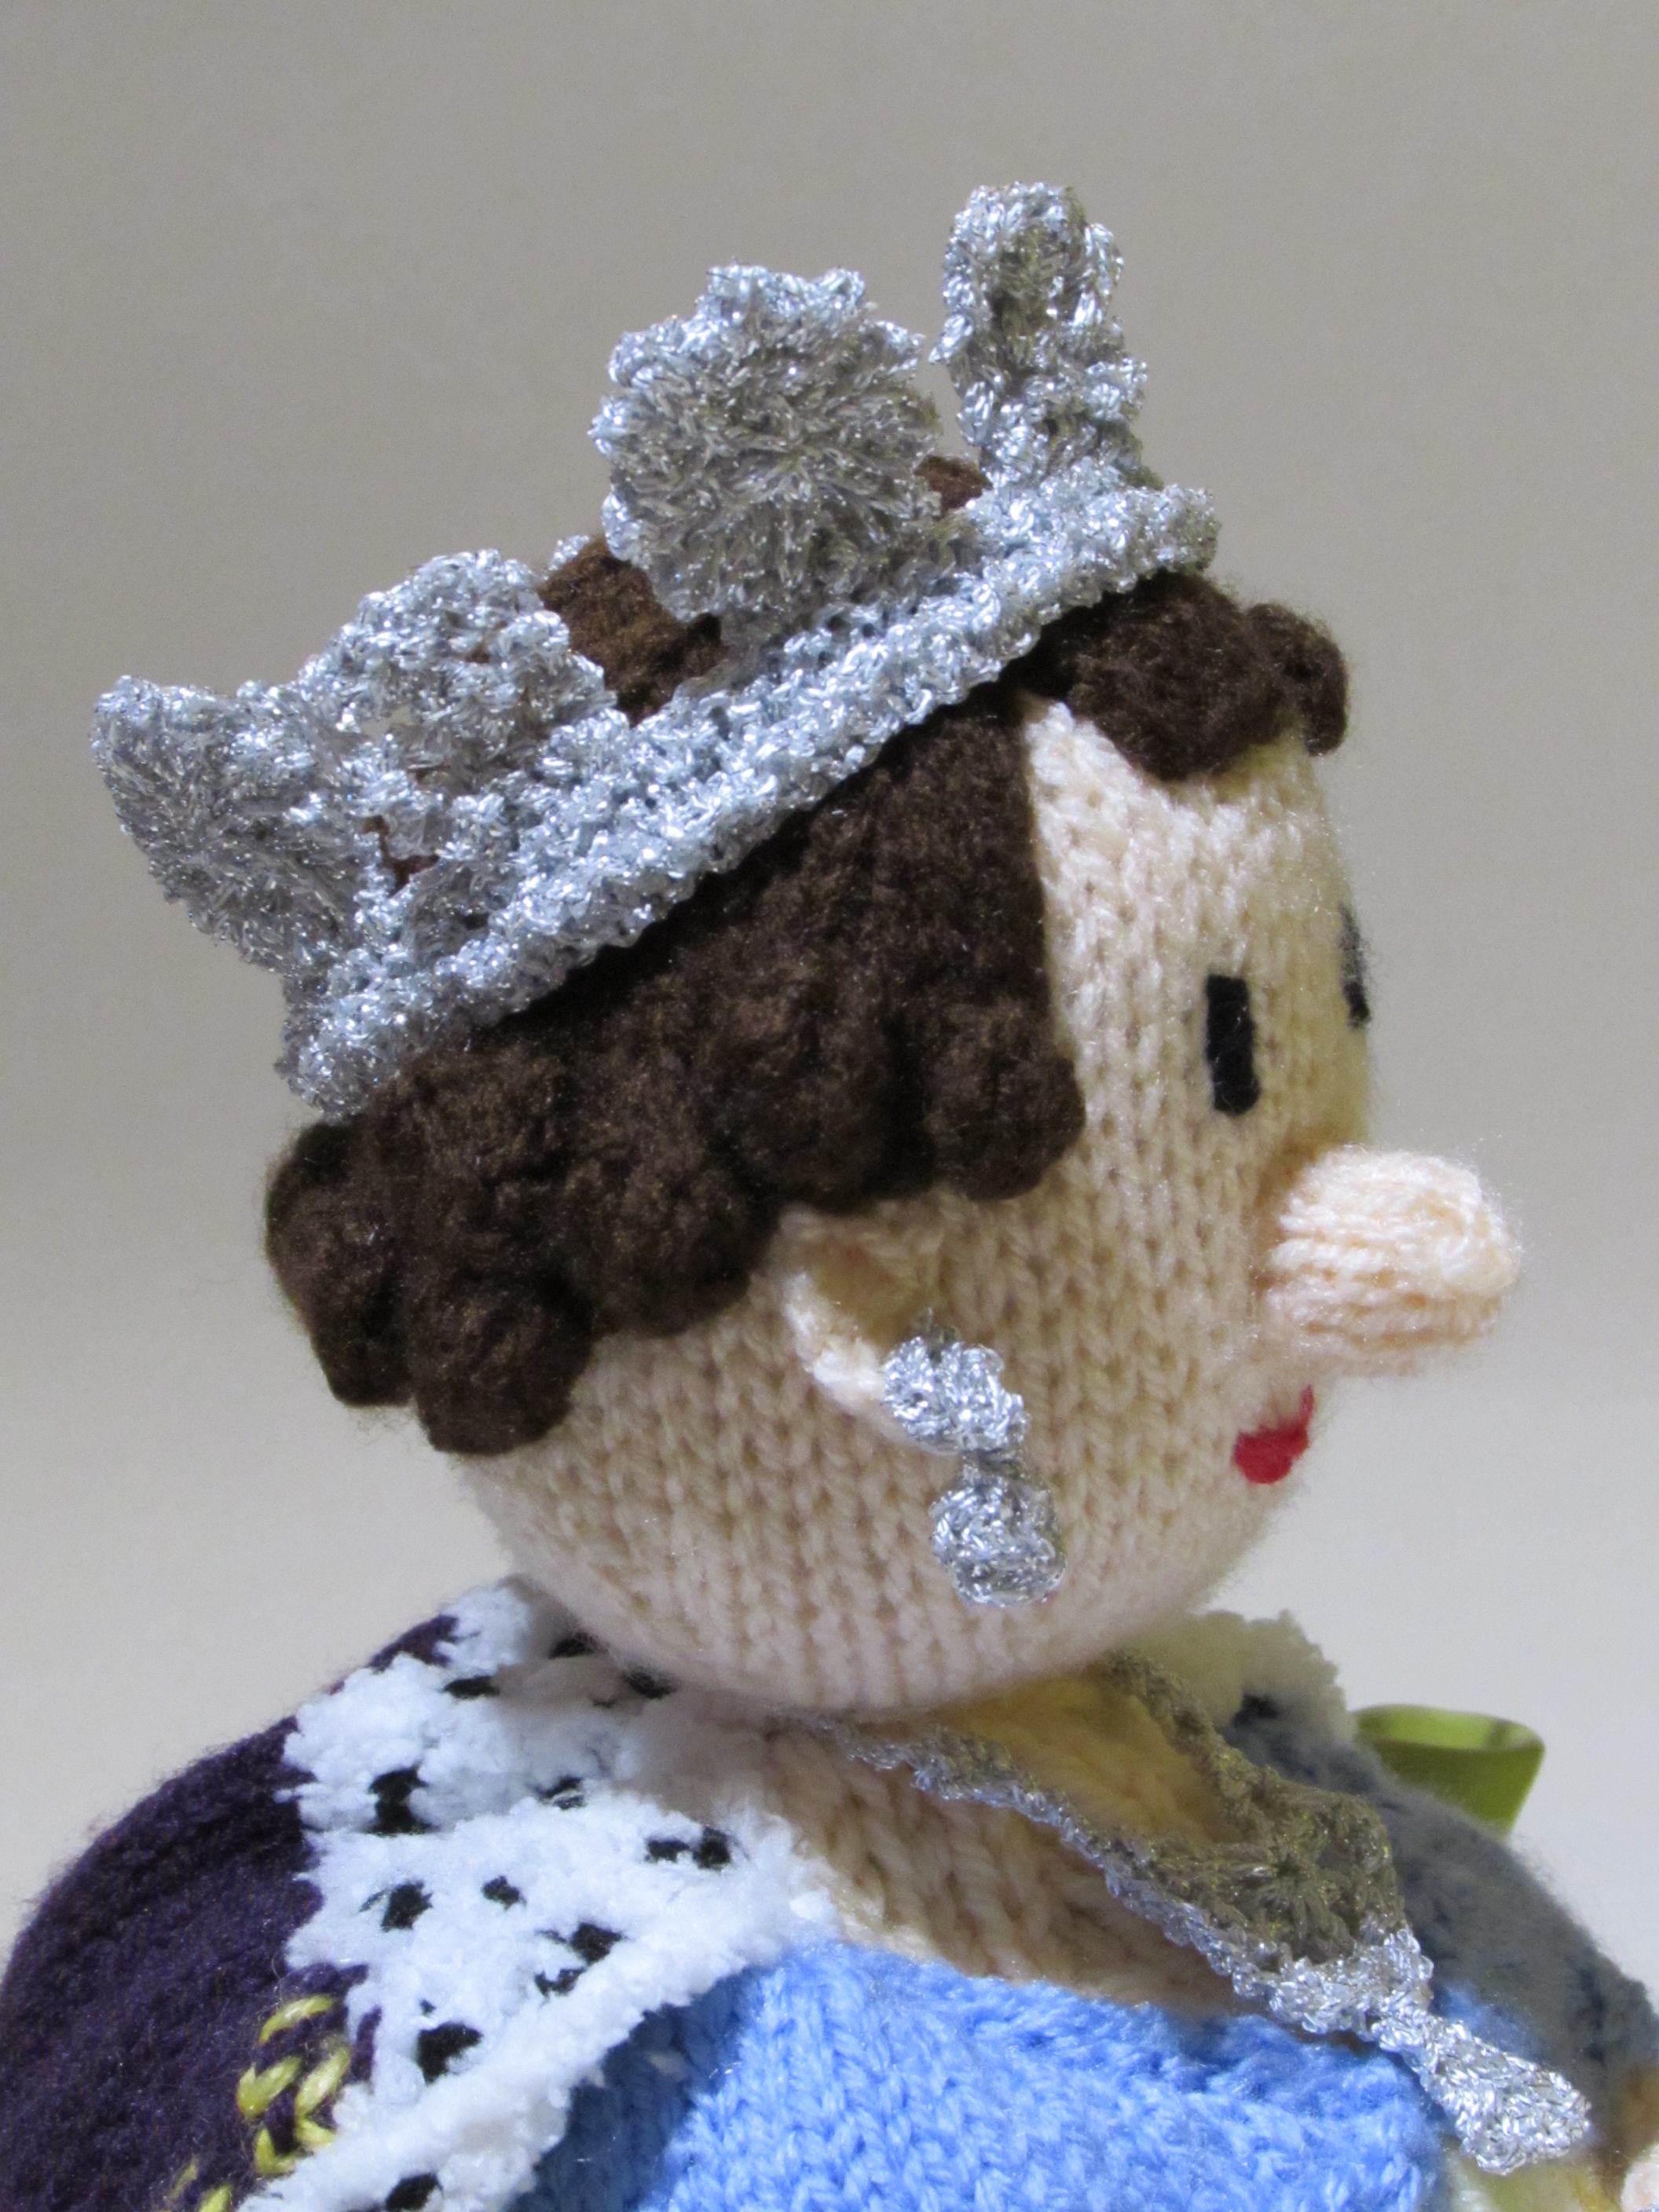 For the Queen Elizabeth II tea cosy I knitted the big bobbles over two stitches: Knit into the front and back of the stitch twice to make 4 sts, do the same in the next stitch (8 sts), turn, P8, turn, K8, turn, (P4tog) twice, turn, K2. This created longer sausage‑shaped bobbles for her hair.
Once you have mastered bobbles you can experiment with them; they are great fun.
Can You Knitting Bobbles Without Turning the Work?
This sounds like an easy question, but it depends. You can't create a full bobble without turning the work; you can create a blip, but I don’t know if you would call it a bobble. On your first row, where you want the blip, you could knit into the front and back of the stitch twice to create 4 sts, and then on the return row, purl those 4 stitches together again.
If you wanted the bobbles only two stitches apart you could:
Row 1: K2, *Knit into the front and back of the stitch twice to create 4 sts, K2; rep from * to end.
Row 2: SL2, *P4, SL2; rep from * to end.
Row 3: SL2, *K4tog, SL2; rep from * to end.
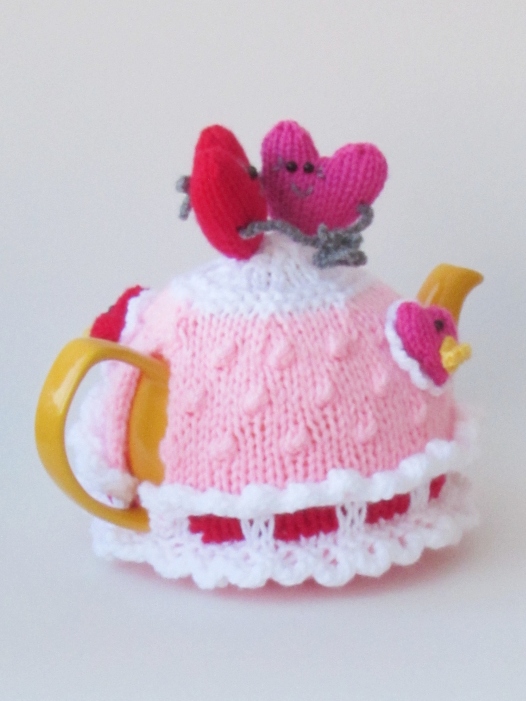
On the In Love Hearts tea cosy (below), the texture on the main cosy uses blimp‑like bobbles. They work well because the cosy is knitted in double‑thickness DK yarn on 5.5mm needles. You can see in the photo that the effect is not a full bobble but a gentle protrusion that gives a soft, raised texture.
Row 1: K2, KFBF, *K3, KFBF; rep from * to last st, K1.
Row 2: P1, P3tog, *P3, P3tog; rep from * to last 2 sts, P2.
But the slipped stitches would mean that the knitting had very little give, and I don't think it is a suitable solution for a bigger bobble because of the restrictiveness of the slipped stitches.
Maybe you could knit into the front and back of the stitch twice to create 4 sts, slip the last 4 sts from the right‑hand needle back onto the left‑hand needle, knit the 4 sts again, and repeat this 3 times, then slip the last 4 sts back onto the left‑hand needle and K4tog. [1 st]
I have never done this; I have only theorised it in light of the question of knitting bobbles without turning the work. It might work and it might make a different sort of bobble than the knitted bobbles I am used to. It would be more of an i‑cord kink, but it might be quite nice.
The last option I can think of for bobbles where the work isn't turned is to knit the bobble separately and sew them on.
But it does beg the question: why is it necessary to knit bobbles without turning the work? I know it’s a little bit scary and time‑consuming, but nothing compared to the latter solution of individual bobbles.
Why Are My Bobbles Flat?
 This might be for a number of reasons. Are you using the recommended yarn? If you have changed the yarn you might get a different end result than the pattern.
Have you checked your tension? If your tension is different this will affect your bobbles.
Are you working the stitch correctly? Re‑read the instructions on the pattern for the bobble. Just because you knitted a bobble for one pattern doesn’t mean all bobbles are made the same way. The designer may have changed the number of increase stitches or the number of rows.
Over time bobbles do go a bit flat. It’s an age thing; the yarn loses its newness and the stiffness in the wool reduces. Heat has an effect on acrylic yarn — the plastic fibres soften when warmed, which is great for blocking but not great if you want to keep bobbles pert.
How To Knit Bobbles Step By Step a TeaCosyFolk Video Tutorial
TeaCosyFolk How to Knit Soapsuds (Bobble Stitch or MB) – Cleaning Lady Tea Cosy Tutorial. This video shows you how to knit soapsuds using the bobble stitch (also known as MB or make bobble), with clear step‑by‑step instructions to help you create neat, rounded bobbles every time.
Tags: smaller bobbles knit