|
|
Basket
0 items, £ 0.00
How to Sew Up Knitting Seams Neatly with Mattress Stitch Photo Tutorial for Tea Cosies
Discover the easiest way to sew up knitting seams neatly every time. Invisible seams made simple for tea cosies and all your knitting projects.
Bulky, untidy seams in your knitting projects getting you down? One option is the seamless route; knitting in the round on circular needles to eliminate seams altogether. But this isn’t a technique for everyone, and for tea cosies it simply won’t work. A plain tube of knitting has no openings for the spout or handle, so shaping and sewing are essential.Everyone wants to know the best way to sew up knitting seams neatly. Whether it’s stocking stitch, ribbing, textured patterns or garter stitch, knitters are always searching for how to create invisible seams in their projects.
Bulky and Untidy Seams in Knitting Projects
When I was a beginner knitter, I often used backstitch seams to sew up my tea cosies. I’d work with the right sides facing, sew neatly in backstitch on the wrong side, then turn the cosy right side out. Sometimes the seams looked fine, but more often than not I was disappointed. Stripes wouldn’t match, vertical lines appeared where stitches pulled together oddly, and the seams felt bulky, changing the shape of the knitting. After all the effort of knitting, it was disheartening to end up with seams that looked messy.
Best Way to Sew Up Knitting Seams Neatly
Then I discovered mattress stitch and everything changed. Mattress stitch is now my go‑to method for sewing up. It’s the technique where you pick up a bar from one side, then a bar from the other, working across the seam. The beauty of mattress stitch is that you sew from the front of the work, so you can see exactly how it’s coming together. No nasty surprises at the end. Stripes align perfectly, points meet with pinpoint accuracy, and the seam lies flat and invisible; ideal for tea cosies.
Why Mattress Stitch Works Perfectly for Tea Cosies
I like to sew the main part of my tea cosies together while they’re on the teapot. First I join the bottom rib sections, then pop the cosy onto the pot. At the drawn‑up top, I use mattress stitch to sew down the row‑end edges. Because the handle is usually a little higher than the spout, I adjust each side to accommodate it, ensuring the cosy fits whichever way the teapot is turned.
Mattress Stitch for All Knitting Projects
Mattress stitch avoids most of the common knitting seam mistakes and frustrations. It’s not just for tea cosies; this invisible seam technique works beautifully across all your knitting projects, from garments to accessories.
Mattress Stitch Tutorial A Step‑by‑Step Guide
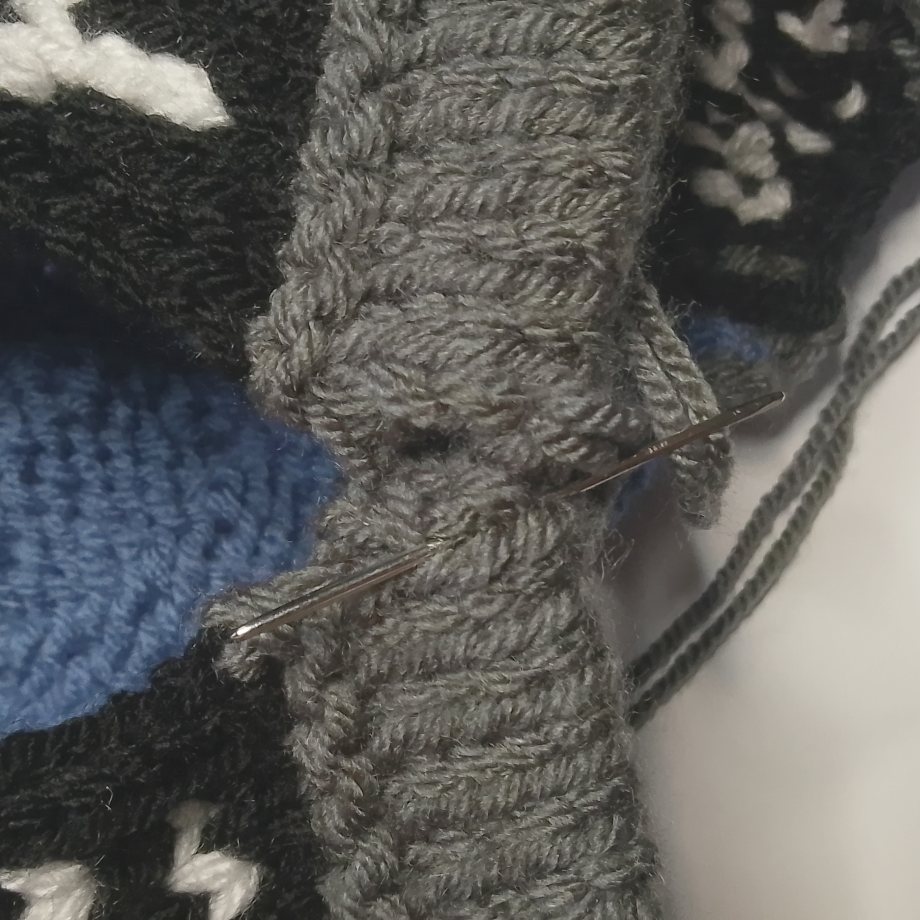
Step 1: Begin mattress stitch by inserting the needle into the first available row end edge on one side of the tea cosy.
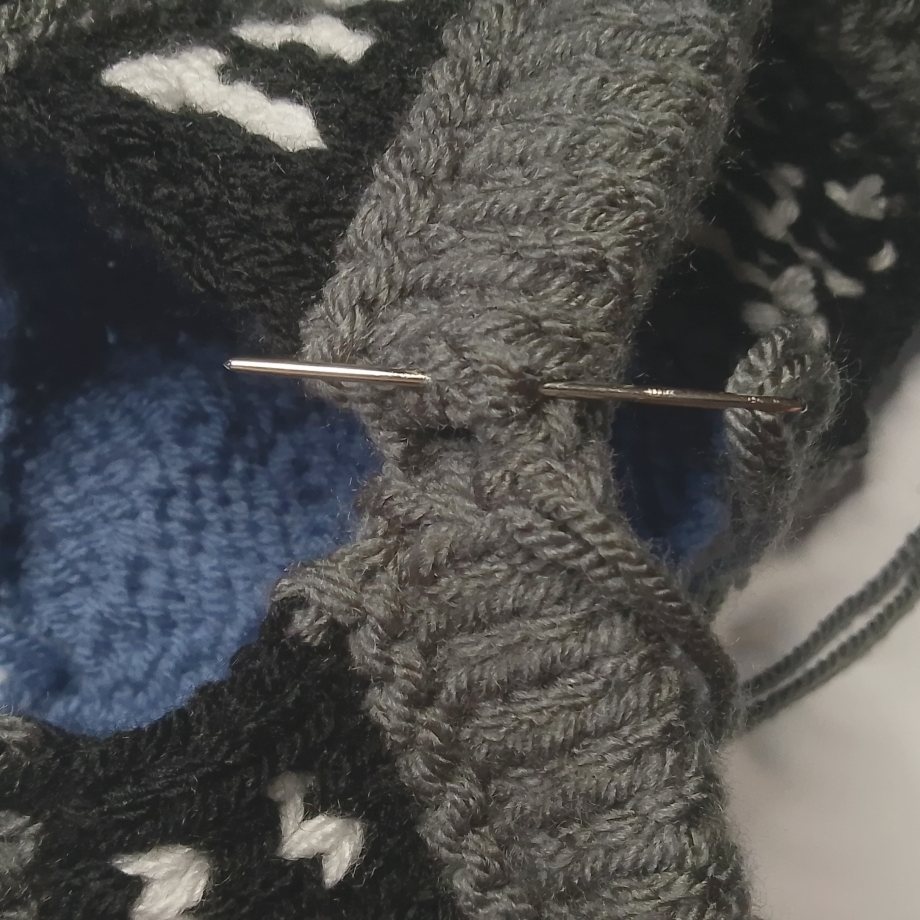
Step 2: Take the needle across and insert under the first available row end edge on the opposite side.

Step 3: Continue sewing by alternating sides, picking up a couple of stitches from the row end edge at a time.
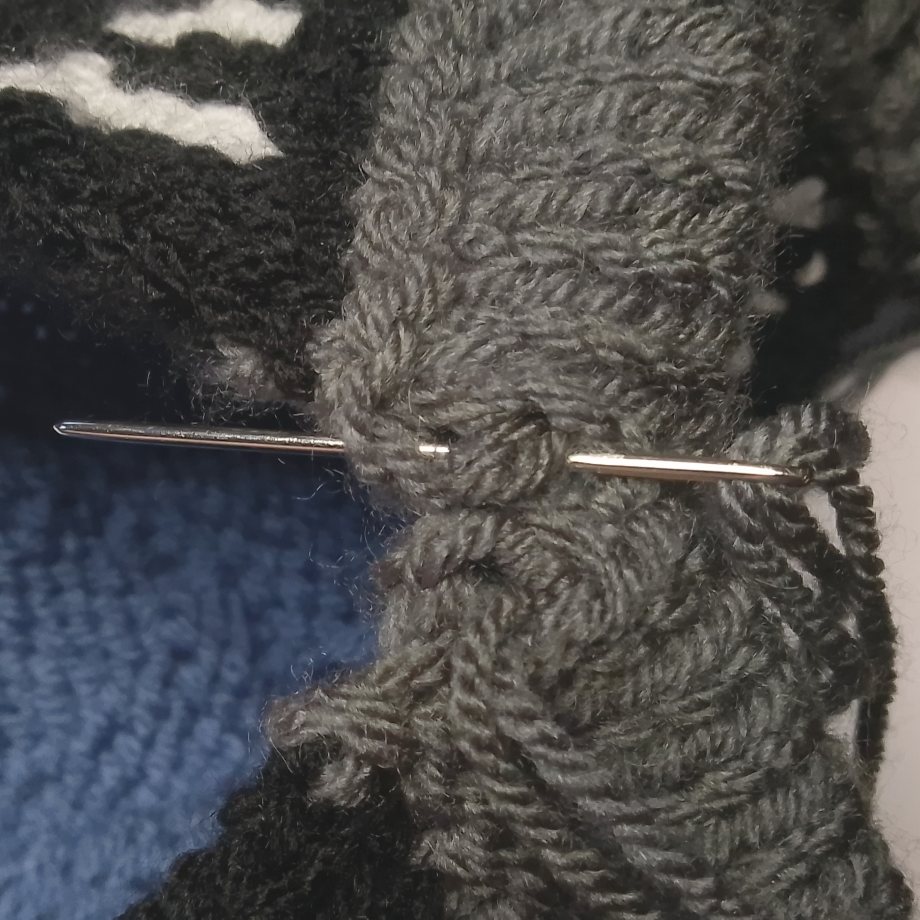
Step 4: Gently pull the yarn to draw the edges together, creating a neat, invisible seam.
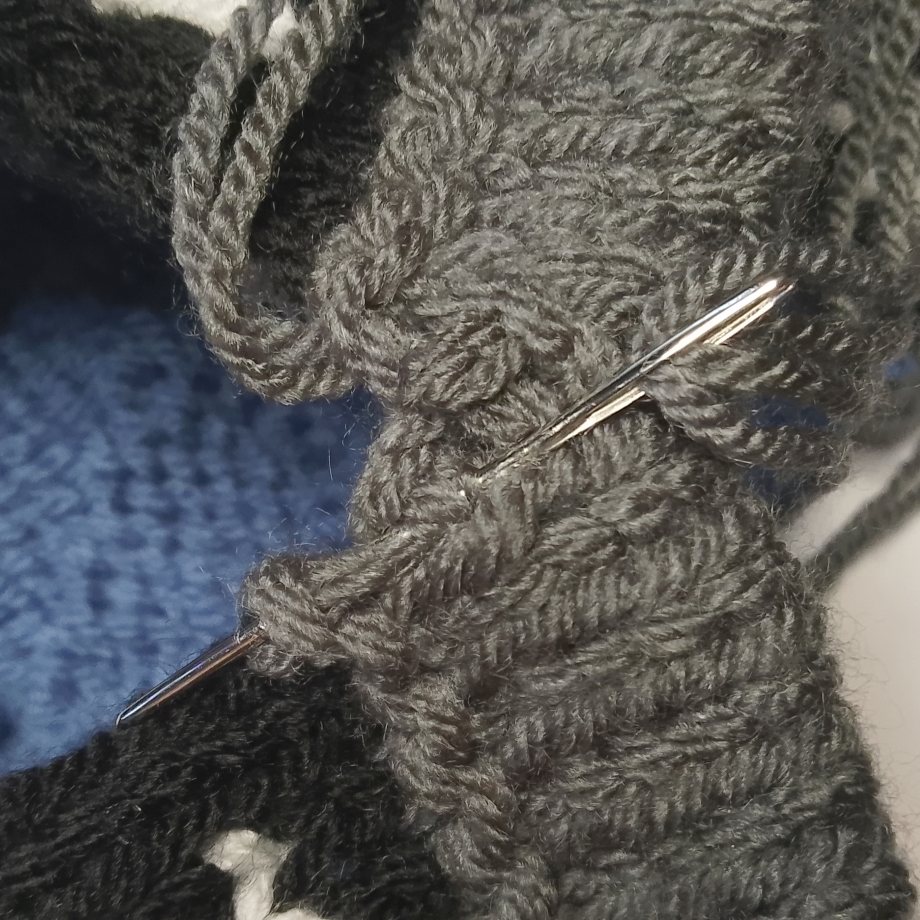
Step 5: Repeat along the row end edge until the seam is closed. The mattress stitch gives a smooth, professional finish.
How to Sew Up Knitting Seams Neatly with Mattress Stitch on a Tea Cosy
In this video, we’ll show you how to sew up knitting seams neatly using the mattress stitch, the essential finishing technique for tea cosies and other knitted projects.
Follow along step by step and discover how to create smooth, professional seams that make your knitting look polished and complete.
Watch how to sew up knitting seams neatly with mattress stitch on a tea cosy.
Tags: knitting seam