|
|
Basket
0 items, £ 0.00
How to Design a Tea Cosy for Any Teapot Size
Are you in search of where to start to design and knit a tea cosy for your teapot? Look no further.
What you need to do is to measure across one side of the teapot at the widest point, but don't include the spout and handle, because they will not be inside the finished cosy. However you do need to measure around the sides of the teapot, because it's not flat. So start are the midway point under the handle and measure around to the centre top of the base of the spout (indicated by the orange arrows) it's hard to do this with a wooden ruler, but it's 18cm for my teapot. Getting this measurement as your starting point means that the tea cosy will fit around your teapot, remember if your main cosy can't go around this point, you will struggle to get your finished tea cosy onto your teapot.
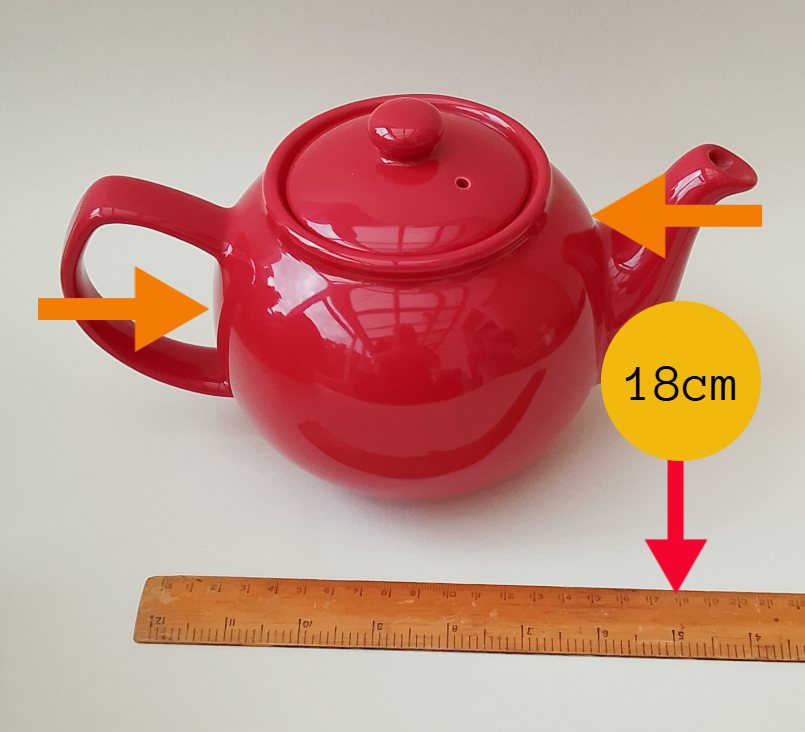
Measure across one side of the teapot at the widest point.
So how many stitches do you need to cast on to knit a tea cosy. Of course this depends on the yarn you are using, the needle size that you want to knit the tea cosy with and the size of your teapot. This all sounds a bit scary with so many variables, so it's probably best to start with the yarn.
On the yarn band you will see a little icon that tells you how many stitches and rows the yarn needs to make a 10cm square.
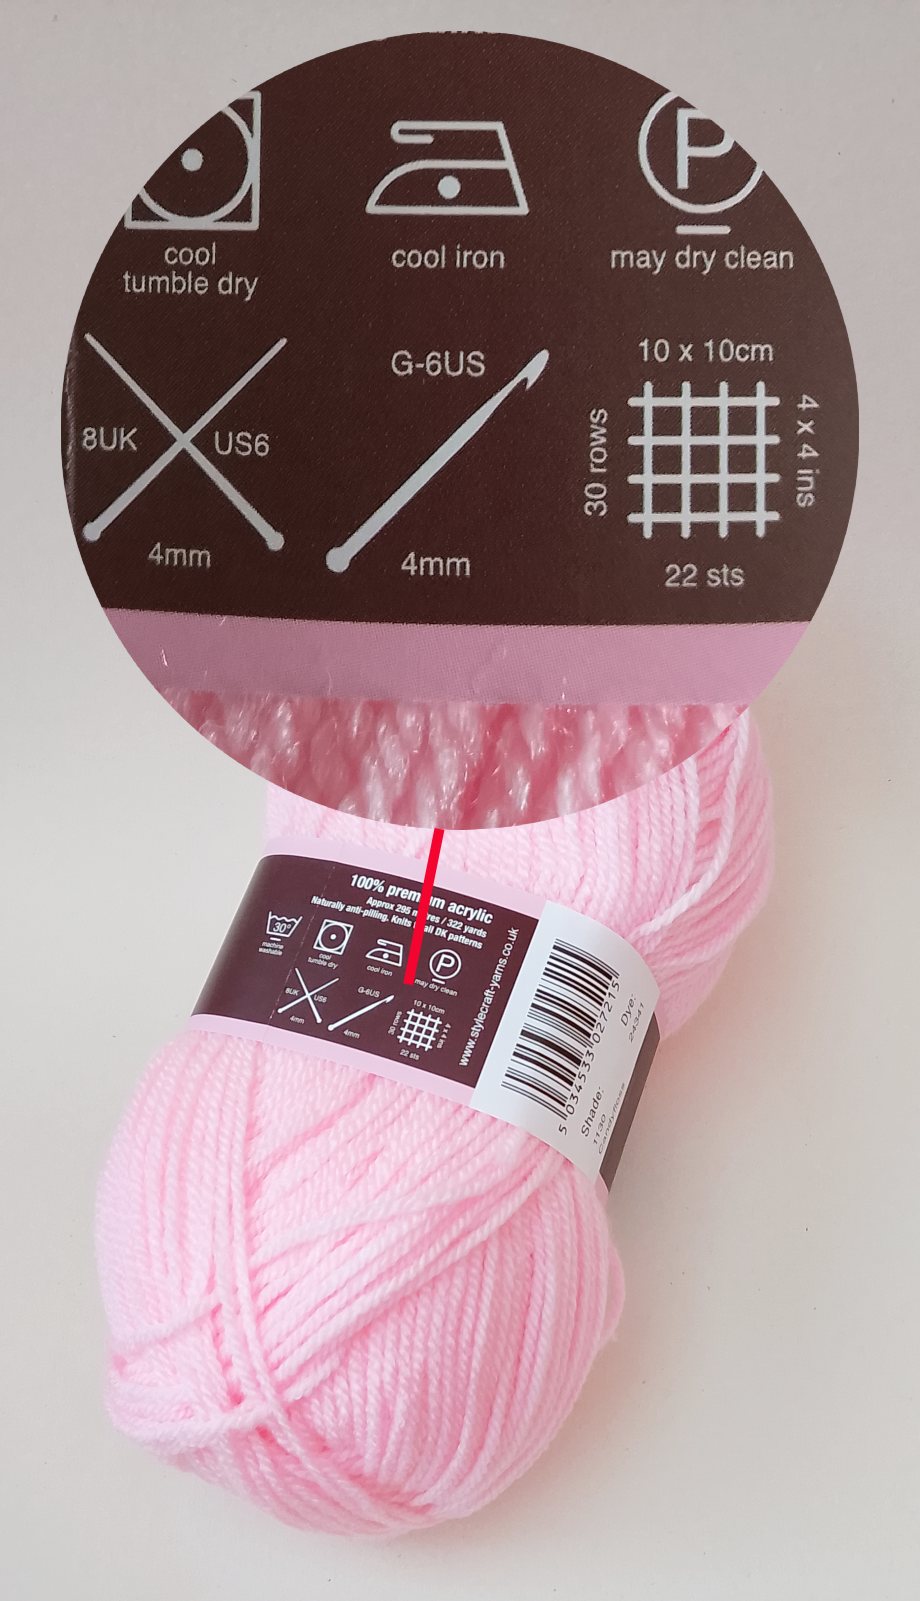
The icon that tells you how many stitches and rows the yarn needs to make a 10cm square.
So for example if your teapot is 18cm across one side, you will need to do a little maths equation to work out how many stitches you need. Looking at the ball band, you need to divide the number of stitches to knit a 10cm square by 10, and then times that number by the width of one side of your teapot in cms. This will give you a ballpark number of stitches. If it's not a whole number, round it up or down either way. For example, this ball of Stylecraft Special DK shows us that 22 stitches using 4.00mm will result in a cat-on edge of 10cm. 22 sts ÷ 10cm = 2.2 and then 2.2 X 18cm = 39.6
Before I choose which way to round this number I need to think, can this number of stitches be divided by 6 or 8? These are the popular numbers to decrease the top by. 40 is divisible by 8 so in this case it is best to round up.
Now if I have 40sts on my needle; my first decrease row would be *K3, K2tog repeated from * to the end of the row and reduce the stitch count by 8. With purl row in between. This means that the decreasing part of the tea cosy will take 7 rows.
How many rows do you need to work to complete your tea cosy?
Now you need to measure the height of your teapot from the bottom to the top including the teapot lid knob.

Measure the height of your teapot from the bottom to the top including the teapot lid knob.
This teapot is 13cm's tall. But I need to take in to account that I will use up 7 rows to decrease the top of the tea cosy.
Looking back at the yarn band, it says you must knit 30 rows to achieve 10cms of stocking stitch, another quick equation will tell us what 7 rows of knitting will be in cms. 7 rows ÷ 30 rows = 0.23 and then 0.23 X 10cm = 2.33cm.
So for my 13cm tall teapot, I will need to knit about 10.7 cm before I start decreasing. according to the yarn band, 10cms is 30 rows. but more accurately is 30 rows ÷ 10cm = 3 and then 3 X 10.7cm = 32.1 rows, which you can round down to 32. So tea cosy will need to be 32 rows before the shaping, if you were to knit it in Stylecraft Special DK with 4mm knitting needles.
Tags: yarn